
Costume Shop: There’s no [censored] like Cuirass

I had this wild notion that the clothes-hangar trick that I figured out for The Lorica Project would work for larger pieces. As I was driving home the other day – and that’s when crazy thoughts occur to me – I wondered if I could make a simple but awesome breastplate/cuirass that would retain it’s shape.
Short version is “sort of.”
But let’s back up. The cuirass is a surprisingly simple design, and yet it’s also got a heck of a lot more shaping – and therefore open parts in the arms and even neck, than one would think. The picture here to the right would have been a very good example.
The Mockup
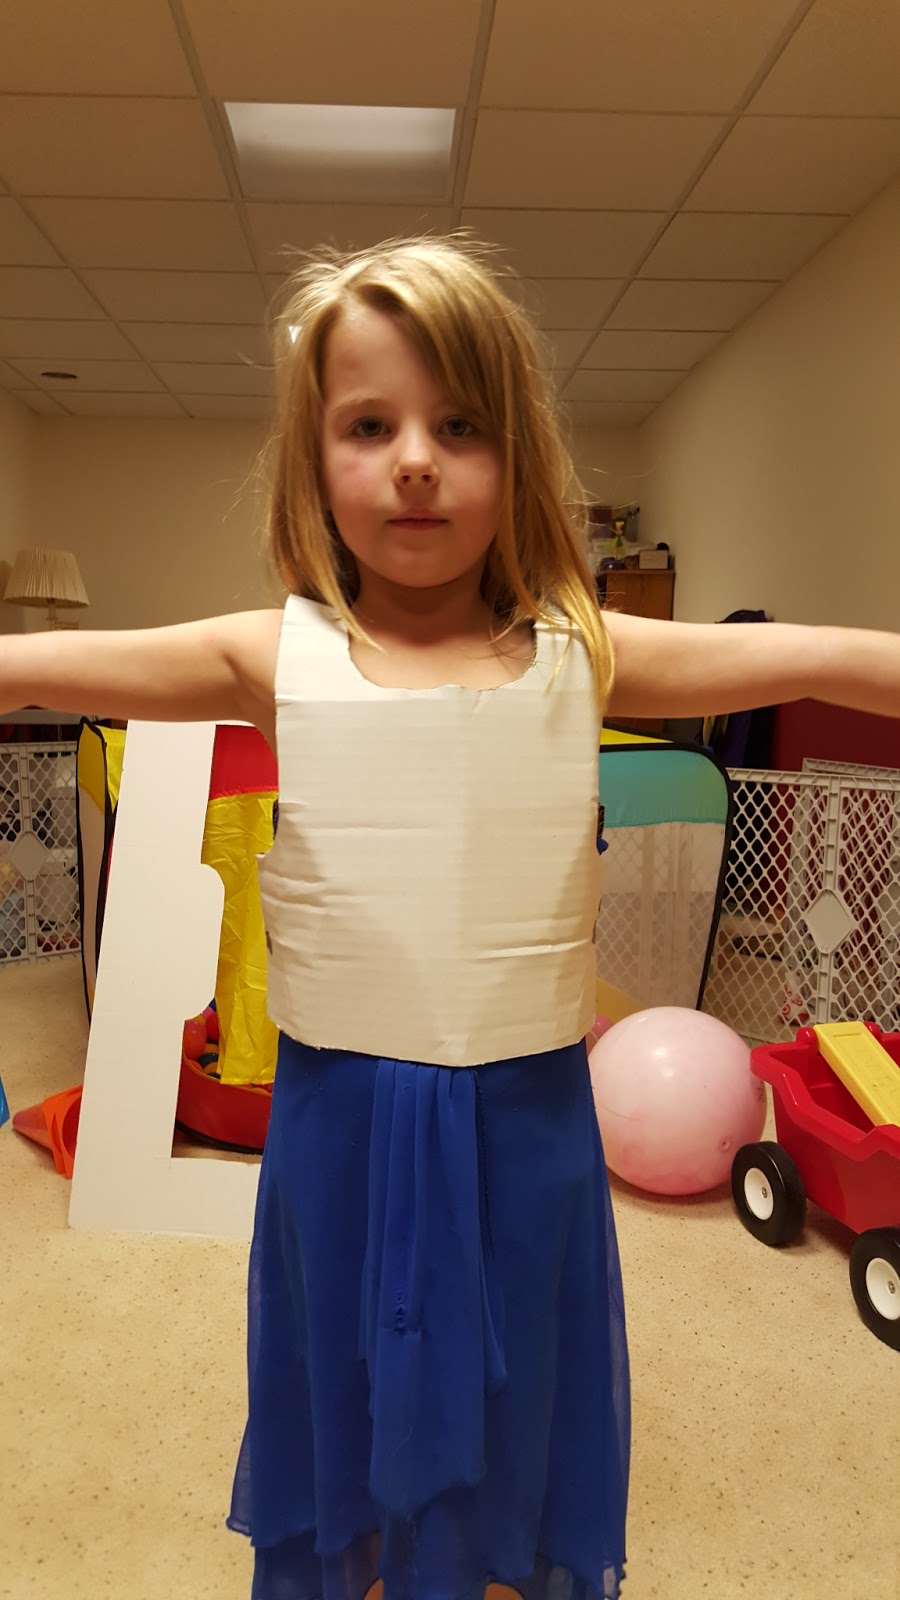
 The initial armor blank was pretty simple. A cutout for the neck (not pictured) and a basic hourglass shape. I wound up with basically 11″ deep and 12″ wide sections, since my test subject was something like 22-23″ around.
Once again, this wasn’t enough. Increasing the girth by 15% so that 22 turned to 25.5″ or so seems like a good rule of thumb, but any real padding will soon push that figure even higher.
 Also, for the shaping, I’m really seeing the value in a mannequin torso, because people – even little people – are rarely served by boxes and square shapes.
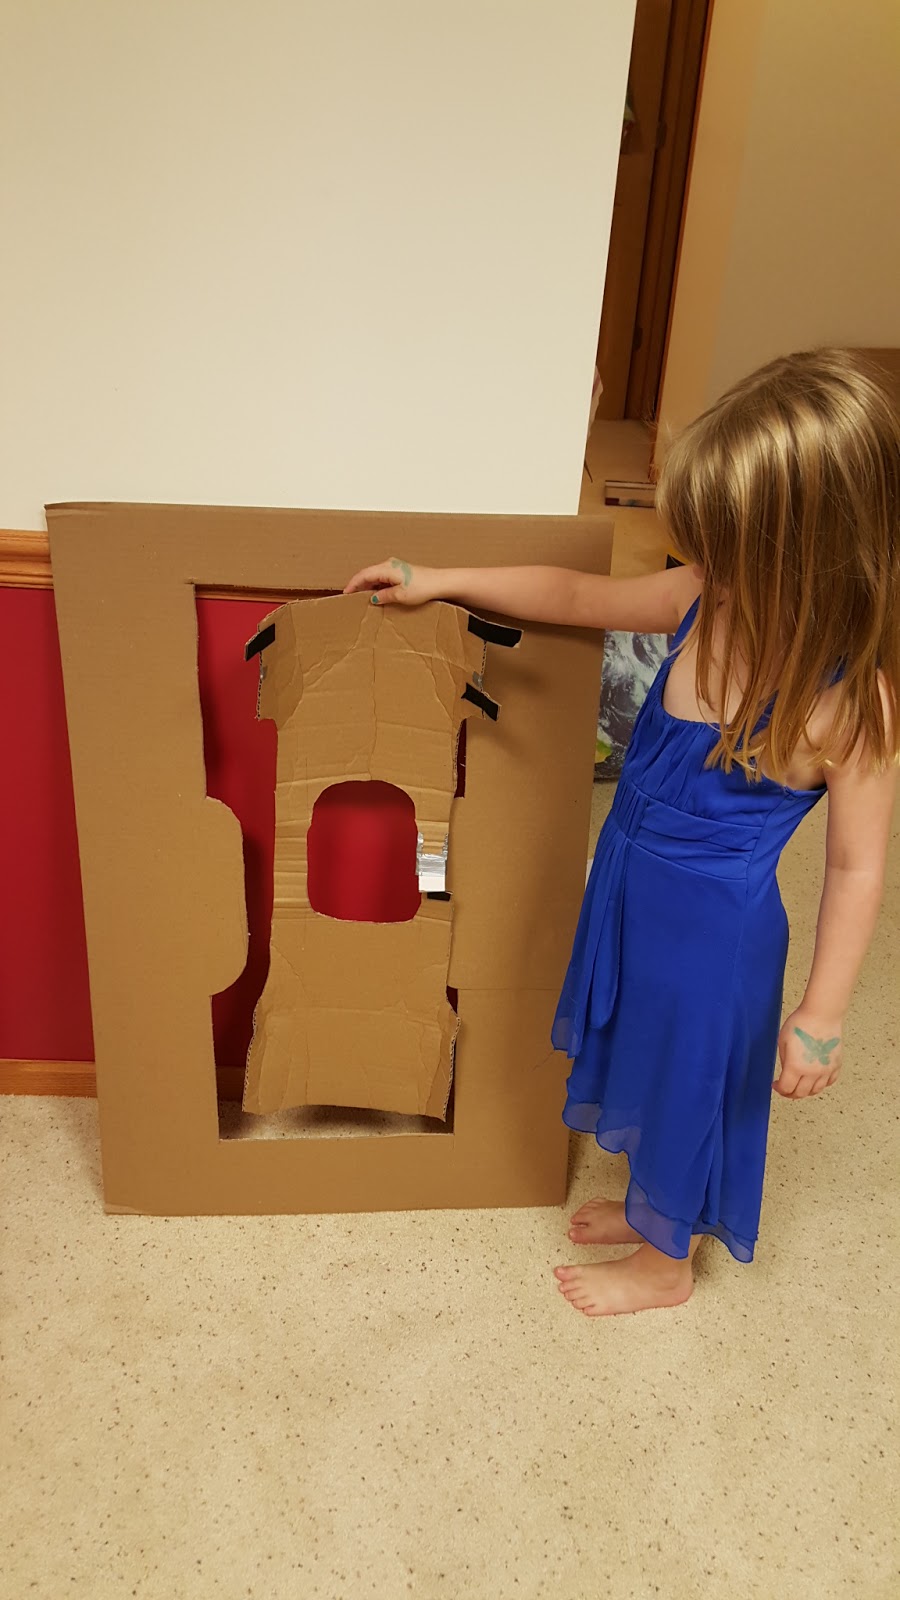
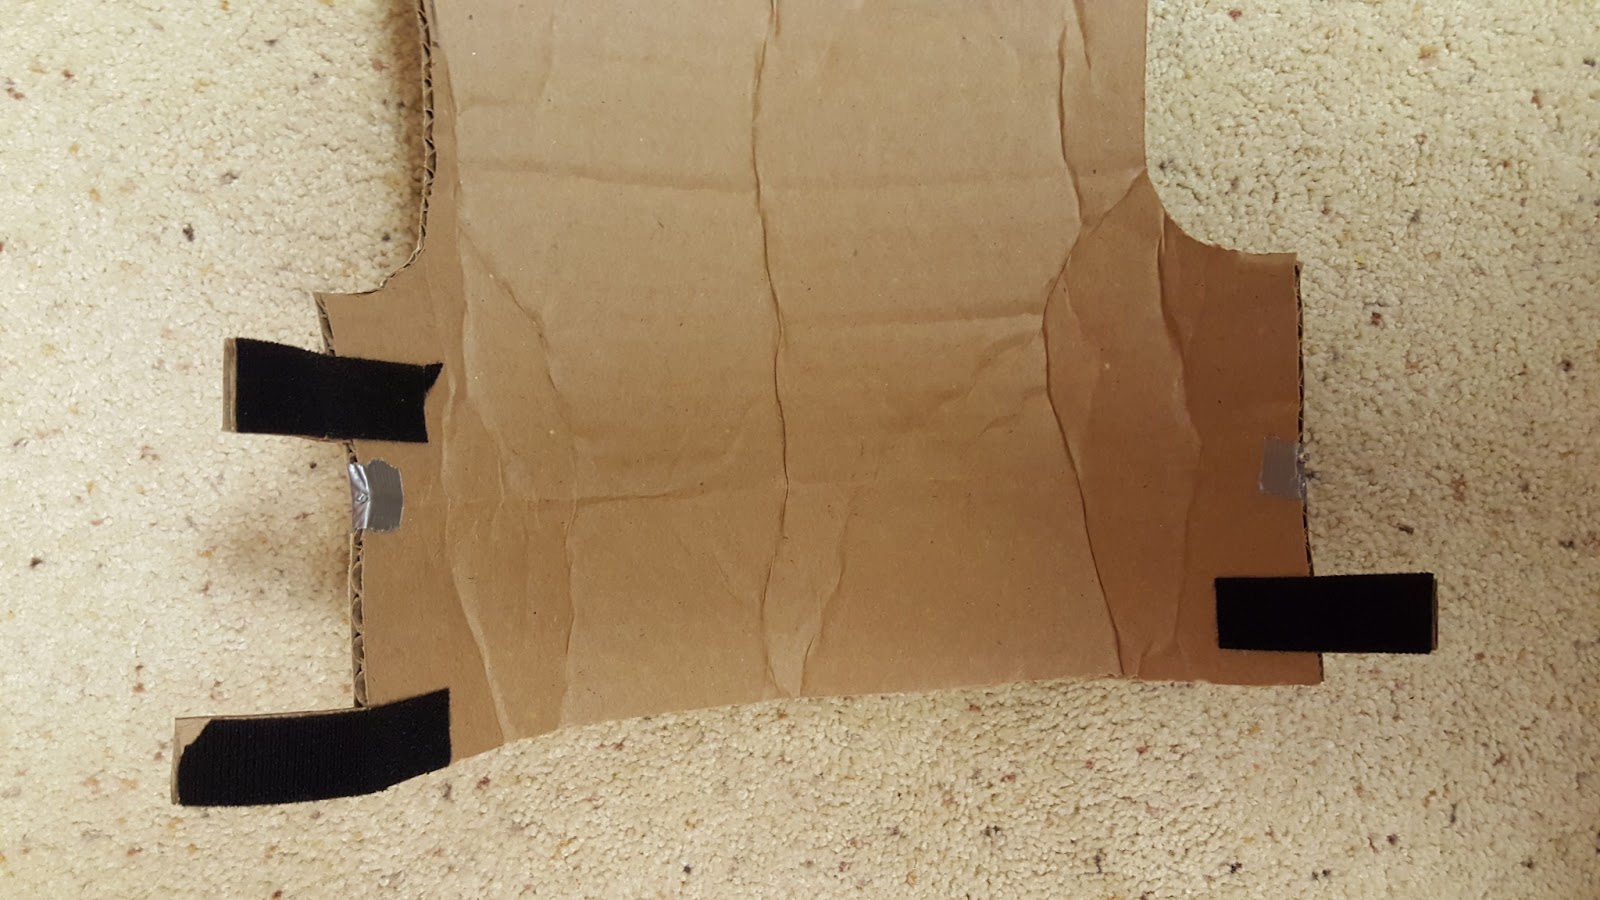
I basically immediately saw that yes, those buckles and straps are required. To protect the neck closely, you can’t get a cuirass over the head. So I quickly cut one shoulder strap and whipped up a fast velcro closure.
After that, I threaded a 12″ coat-hangar clipping through each torso piece, though it would turn out that the hangar is going to need to be fairly precisely placed.
The shaping was attempted by pushing the armor against the model. This did not go as well as I’d have liked. It also didn’t go as well as the model would have liked. So room for improvement there. Really, the short version is that the 14.5 gauge standard coat-hangar wire is a bit too robust for this application. We’d have done better with smaller gauge wire (but still stiffened) and using more of them.
Still, once I had the blank wrapped around her, I saw how far off the simple mockup was from a good shape. I also saw that I needed to whip up some quickie Velcro buckles on each side of the piece. That was some quick work.
The bottom of the plate either needs to be lipped out (like the above real piece), or bowed upwards, to allow the subject to bend over. It can (and will look better, I think) if it’s longer in the back, though not too long.
I’m much less satisfied with this piece than the lorica that I mocked up.
Lessons learned
- You really need pretty wide arm holes for this to work properly
- It’ll ride up at the drop of a hat. Contouring the bottom and getting it right is probably required
- A torso model is a good idea. Lay fabric or paper down, cut to shape or piece it together, then lay it flat and cut the cardboard out of that. You’ll waste less material.
- There’s a darn good reason these things were buckled together. Plan for the buckles ahead of time
- I’d actually have the shoulder straps cut long and buckle on the back of the piece, which will necessitate a two-piece design, rather than the one-piece design I started with. It’ll be more forgiving of mistakes, plus if you wish to hang pauldrons off the shoulders, you won’t be doing it directly on the closure

So how did it go overall? I’ll give it a C+ for a first attempt. Forgive me for the terrible picture layout blogger forces me to use!


